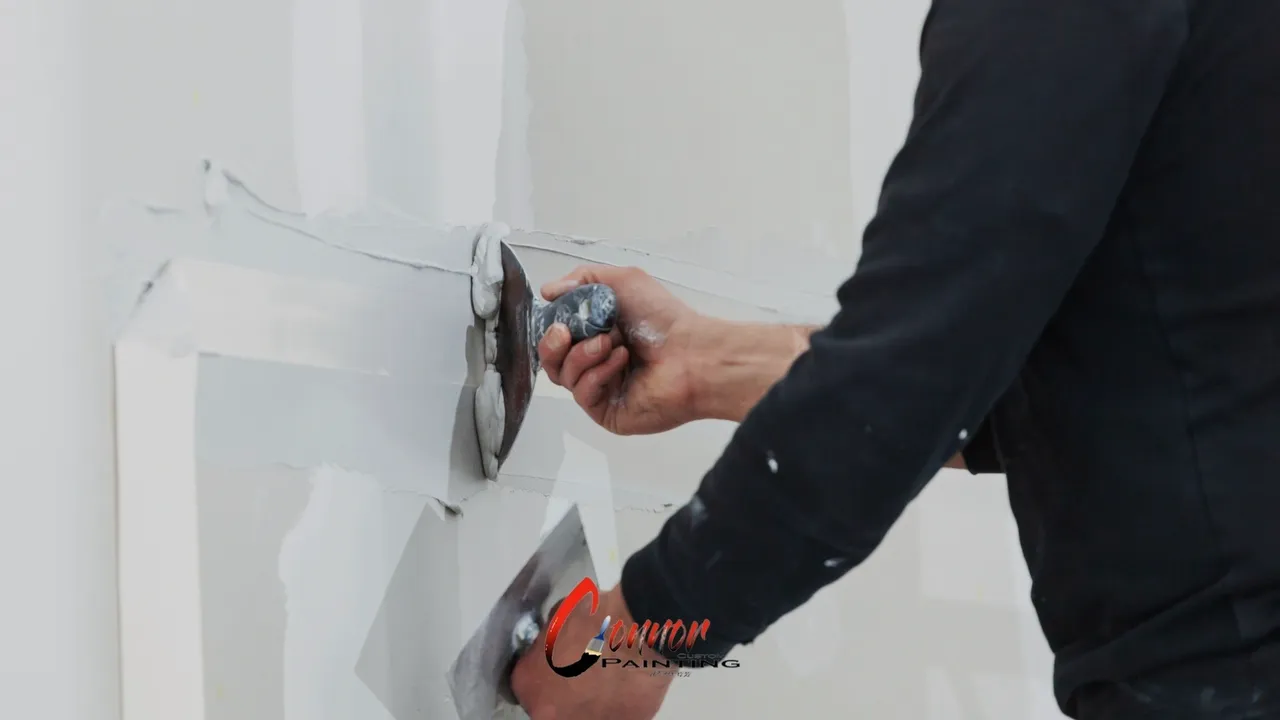
Introduction
Have you ever bumped a doorknob a little too hard, or maybe hung a shelf that left some unwelcome guests (holes) in your drywall? We’ve all been there. Drywall, despite being a workhorse building material, can be surprisingly susceptible to minor damage. But before you call in the reinforcements (and a hefty bill), fear not! This comprehensive DIY drywall repair guide will turn you into a patching pro in no time.
Whether you’re a seasoned DIYer or a curious homeowner looking to tackle a quick fix, this guide will equip you with the knowledge and step-by-step techniques to conquer those pesky drywall damages. From small holes and cracks to more substantial repairs, we’ll cover everything you need to know to get your walls looking smooth and pristine again.
Not only will you save money by tackling these repairs yourself, but the sense of accomplishment is a bonus reward! So, grab your tools, put on your handyman hat, and let’s get started on turning your drywall battlefield into a flawless finish.
Assessing the Drywall Damage
Before we dive into the toolbox, let’s become drywall detectives! Identifying the type and extent of the damage is crucial for choosing the most effective repair approach.
Here’s your cheat sheet to decode those drywall woes:
- Nail Pops and Screw Holes: These tiny craters or bumps are caused by loose fasteners pushing through the drywall surface. They’re a common culprit, especially in new construction as the house settles.
- Cracks: Hairline cracks can appear due to normal settling or minor structural movement. Larger cracks might require further investigation to identify the underlying cause.
- Holes: From misplaced hammer swings to picture frame removals, holes come in all shapes and sizes. Knowing the hole’s size will determine the repair method (patching or mesh application).
Tip: When assessing the damage, grab a ruler to measure the hole or crack’s width and length. This will help you select the appropriate repair materials like joint compound and mesh patches (for larger holes).

Essential Tools and Materials for Drywall Victory
Now that you’ve identified the enemy (drywall damage), it’s time to assemble your weapons (tools and materials) for battle!
Here’s a list of the essential items you’ll need to conquer those drywall imperfections:
- Putty Knife Squadron: You’ll need a variety of putty knife sizes for tasks like applying joint compound, smoothing surfaces, and filling in small gaps.
- Sandpaper Brigade: Grab a selection of different grit sandpaper (coarse, medium, fine) for rough sanding, smoothing, and achieving a final, flawless finish.
- Joint Compound Cavalry: This versatile paste comes in lightweight and setting varieties. Lightweight compound is ideal for small repairs, while setting compound provides extra strength for larger areas.
- Drywall Saw/Jab Saw: This trusty tool allows for precise cutting of drywall patches to perfectly fit the damaged area.
- Mesh Drywall Patch Battalion (for larger holes): This fiberglass mesh provides reinforcement and stability when repairing bigger holes.
- Drill Sergeant and Drywall Screw/Nail Platoon: These will come in handy for securing drywall patches (especially for larger repairs).
- Utility Knife Specialist: This sharp tool is perfect for scoring the drywall surface for better joint compound adhesion and for cutting drywall patches if needed.
- Primer Posse: Applying primer before painting ensures better paint adhesion and a uniform finish.
- Paint Platoon (optional): If you need to match the existing paint color, grab some paint to complete the repair seamlessly.
By having these essential tools and materials at your disposal, you’ll be well-equipped to tackle most DIY drywall repairs with confidence!
Step-by-Step Techniques for Different Drywall Damages
Now that you’ve assembled your DIY army (tools and materials) and identified the enemy (drywall damage), it’s time to strategize and conquer!
Here, we’ll explore step-by-step repair techniques for common drywall woes:
A. Conquering Small Holes (Nail Pops & Screw Holes):
- Soldier Prep: Apply light pressure with your putty knife to widen the hole slightly, creating better joint compound adhesion.
- Joint Compound Attack: Spread a thin layer of lightweight joint compound over the hole using your putty knife.
- Sanding Smoothing: Once the compound dries, use fine-grit sandpaper to smooth out the patch and surrounding area.
- Prime and Conquer: Apply a thin coat of primer over the repaired area to prepare for painting (if needed).
B. Crack Eradication Mission:
- Crack Clearing: Using a utility knife, carefully widen the crack slightly to create a V-shaped groove for better joint compound filling.
- Mesh Backup: Apply self-adhesive mesh drywall tape over the widened crack, ensuring it covers the entire area.
- Joint Compound Assault: Spread a thin layer of joint compound over the mesh tape, covering it completely.
- Sanding to Victory: Once dry, use medium-grit sandpaper to smooth the repaired area. Apply additional thin coats of joint compound and sand in between until the surface is flush with the wall.
- Prime and Paint: Apply primer and then paint (if needed) to match the surrounding wall.
C. Patching Up Large Holes:
- Patch Cutting: Measure the hole and cut a matching size patch from a drywall sheet.
- Support Mission: Inside the hole, secure horizontal furring strips (thin wood pieces) parallel to the top and bottom to support the patch. Screw them into the wall studs for stability.
- Patch Placement: Place the drywall patch onto the furring strips and secure it with drywall screws along the edges.
- Joint Compound & Mesh Backup: Apply joint compound over the patch and surrounding wall area. Embed mesh drywall tape over the joint area for reinforcement.
- Sanding the Battlefield: Once dry, use coarse-grit sandpaper to remove excess compound and achieve a leveled surface. Apply additional thin coats of joint compound with sanding in between until the patch seamlessly blends with the wall.
- Prime and Conquer: Apply primer and then paint (if needed) to camouflage the repair.
Remember: Throughout this process, emphasize following these techniques for each repair method to achieve a smooth, seamless finish that makes your drywall repairs practically invisible!
Mastering the Art of Texture:
Conquered the repair, but your wall has a textured finish? Don’t worry, with a little practice, you can camouflage the repair and achieve a seamless match.
Here are a couple of optional techniques:
- Texture Spraying: For a sprayed texture, purchase a can of premixed texture compound and a texture sprayer tool. Following the manufacturer’s instructions, practice spraying on a cardboard scrap to get the hang of it before tackling the repaired area. Hold the sprayer at a consistent distance and move it in a sweeping motion to achieve the desired texture.
- Ragging Technique: For a more subtle texture, you can use a damp rag and joint compound. Dab the rag lightly in the compound and then dab it on the repaired area in a random pattern to create a similar texture to the surrounding wall. Be light-handed and practice on a hidden area first to perfect your technique.
Remember: Matching texture can be tricky. If you’re unsure or dealing with a complex texture, consider consulting a professional or opting for a light retexture of the entire wall for a uniform look.
Sanding, Priming & Painting for Perfection
We’re almost there! Now that you’ve patched, filled, and maybe even textured, it’s time to achieve a flawless finish:
- Sanding is Key: Sanding is crucial for achieving a smooth, invisible repair. Once your joint compound is completely dry, use fine-grit sandpaper to gently sand the repaired area and surrounding wall until it feels smooth. Be sure to remove any excess compound and ensure a seamless transition between the patch and the existing wall.
- Prime Time: Applying a coat of primer over the repaired area is essential. Primer helps create a uniform painting surface and ensures better paint adhesion. Use a high-quality interior primer and apply a thin, even coat. Let it dry completely before moving on.
- Painting the Grand Finale (Optional): If you need to match the existing paint color, grab your paintbrush or roller and apply a thin coat of paint to blend the repaired area seamlessly with the surrounding wall. Choose paint that matches the existing sheen (flat, eggshell, etc.) for a flawless finish.
You’ve successfully navigated the battlefield of drywall repair and emerged victorious. With a little practice and these handy tips, you can tackle most DIY drywall repairs with confidence and transform your walls from warzone to smooth perfection.
When to Call in the Drywall Cavalry
While this guide empowers you to tackle many DIY drywall repairs, there are situations where calling in a professional is the best course of action.
Here are some signs to watch out for:
- Extensive Damage: Large holes, deep cracks, or damage spanning across multiple wall sections are best left to experienced drywall repair professionals. They have the expertise, tools, and experience to handle complex repairs efficiently.
- Water Damage: If drywall damage is accompanied by water stains or mold growth, it’s crucial to address the underlying moisture issue before tackling the drywall itself. Professionals can identify the source of the water damage and perform necessary repairs before restoring the drywall.
- Lack of Confidence: DIY is all about feeling empowered, but there’s no shame in admitting a project is beyond your comfort zone. If you’re unsure about your ability to achieve a professional finish, calling a drywall repair service can save you time, frustration, and potentially the need for further repairs down the line.
- Electrical Concerns: If your repair involves working near electrical outlets or wires, it’s best to leave it to a licensed electrician to avoid any safety hazards.
Remember: Consulting a professional doesn’t diminish your DIY spirit! Sometimes, the smartest repair strategy involves knowing when to call in the experts.
Connor Custom Painting – Your Local Drywall Repair Heroes!
Looking for a flawless finish, but short on time or expertise? Connor Custom Painting is here to help! We are your one-stop shop for all your drywall repair needs, big or small. Our experienced and insured professionals can tackle any drywall damage, from minor touch-ups to extensive repairs.
In addition to drywall repair, we also offer a variety of other services to enhance your home’s interior and exterior:
- Exterior Painting: Breathe new life into your home’s exterior with a fresh coat of paint. We use high-quality paints and meticulous techniques to ensure a lasting, beautiful finish.
- Interior Painting: Transform your living space with professional interior painting services. From choosing the perfect color scheme to flawless application, we’ll create a beautiful and inviting atmosphere.
- Cabinet Painting: Update your kitchen or bathroom cabinets with a professional paint job. We can revive old cabinets or completely transform them with a new color and finish.
- Wallpaper Removal: Tired of outdated wallpaper? We can remove wallpaper efficiently and minimize damage to your walls, leaving them prepped for painting or new wallpaper installation.
Here’s what sets Connor Custom Painting apart:
- Quality Workmanship: We take pride in delivering exceptional results, ensuring your drywall repairs and painting projects are invisible to the naked eye.
- Experience You Can Trust: Our team of skilled professionals has the expertise to handle any drywall repair challenge or painting project, big or small.
- Efficient Service: We understand your time is valuable. We work efficiently to get the job done right, the first time, minimizing disruption to your home.
- Competitive Rates: We offer competitive pricing for our drywall repair and painting services.
We proudly serve Sagadahoc, Lincoln & Cumberland Counties!
Contact Connor Custom Painting today for a free consultation!
Email: [email protected]
Phone: (207)449-9838
Website: https://connorcustompainting.com/
Let us turn your drywall woes and any other home improvement dreams into a reality!